The client, who has Usher's Syndrome affecting her vision drastically, cannot do many daily tasks we take for granted. However, her disability makes it difficult for her to do so. We were tasked with creating a design that would help her in some way.
The team was inspired by a video she posted about her struggles cooking, and decided to the aim would be to invent something to help the Client cut food. A refined problem statement was developed to lay out the aims and objectives of the design.
Problem Statement:Kimberly, a client who is diagnosed with Usher's Syndrome experiences hearing and vision impairments which affect her peripheral vision and induces colour-blindness. Within her home she experiences significant challenges including processing and handling food items safely. The client requires a compact, lightweight, and affordable device that enables her to cut food autonomously, easily and without injury.
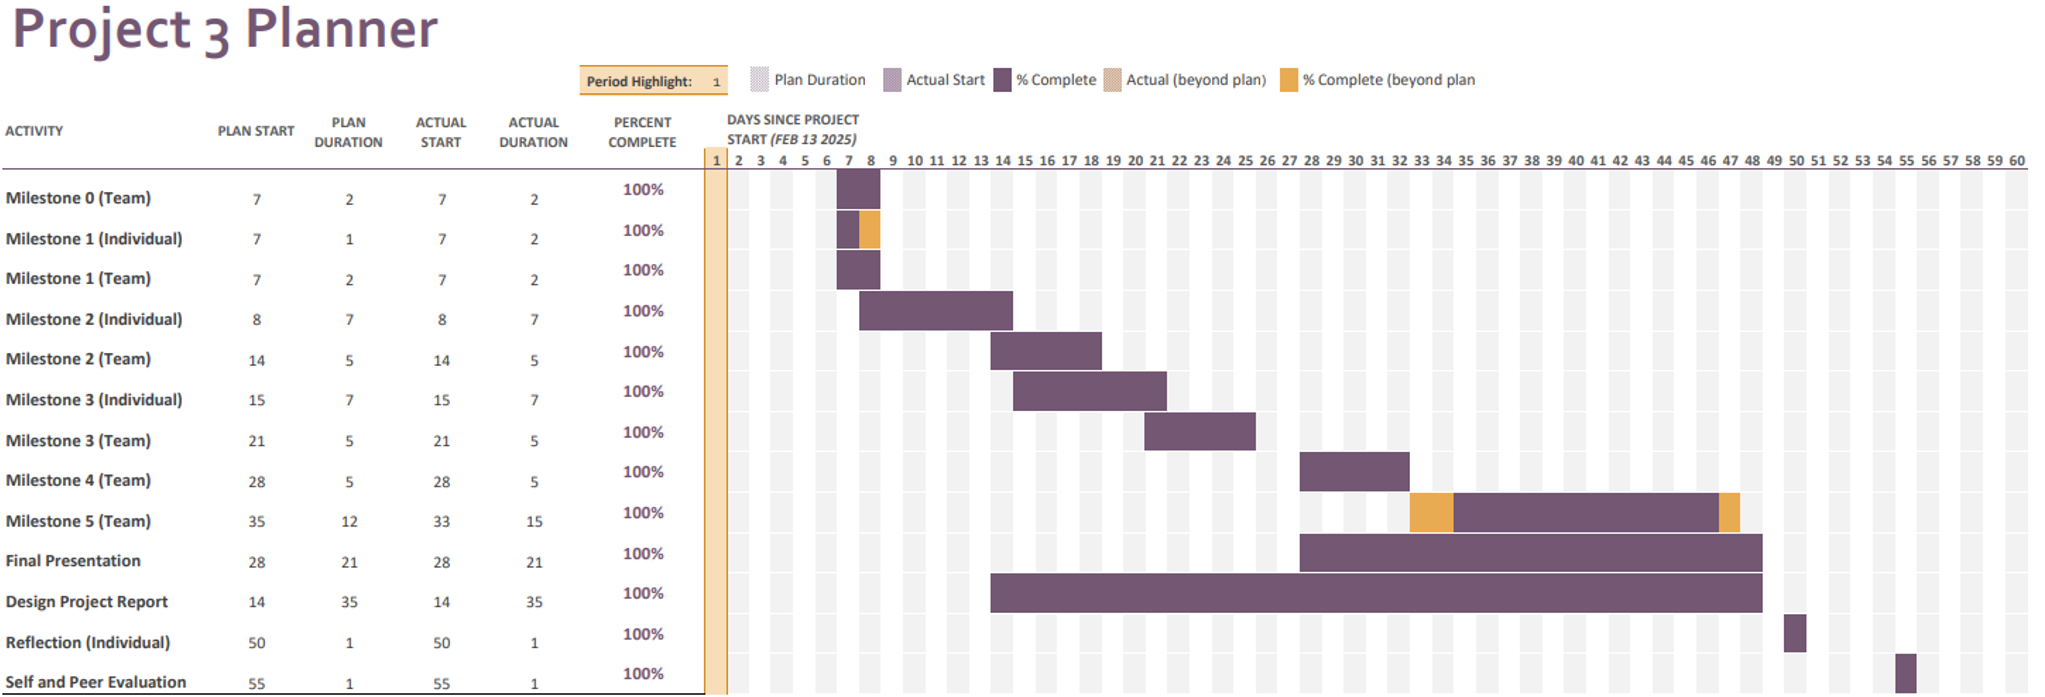
Objectives/Constraints:As they would be the main evaluation method for the design, objectives/constraints were created (Fig. 1).
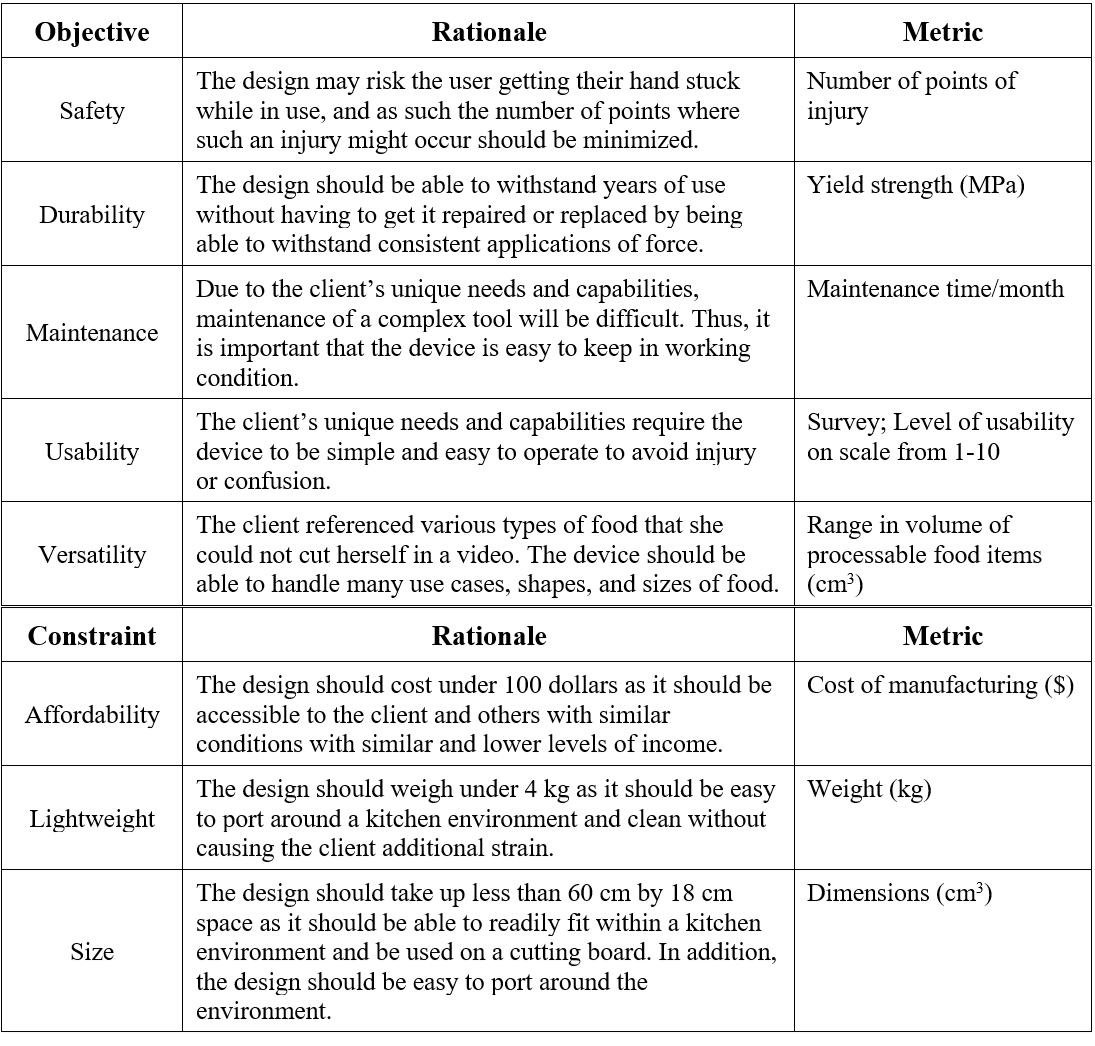
Fig. 1: Objectives, rationale, and metric
The team conducted individual research. I researched past patents and their designs/innovations, which led to the creation of numerous initial designs.
We conferred over initial designs, and we decided my initial design (Fig. 2) was best and most suited to the problem. A morph chart was created, and used to decide which elements were best for each objective.
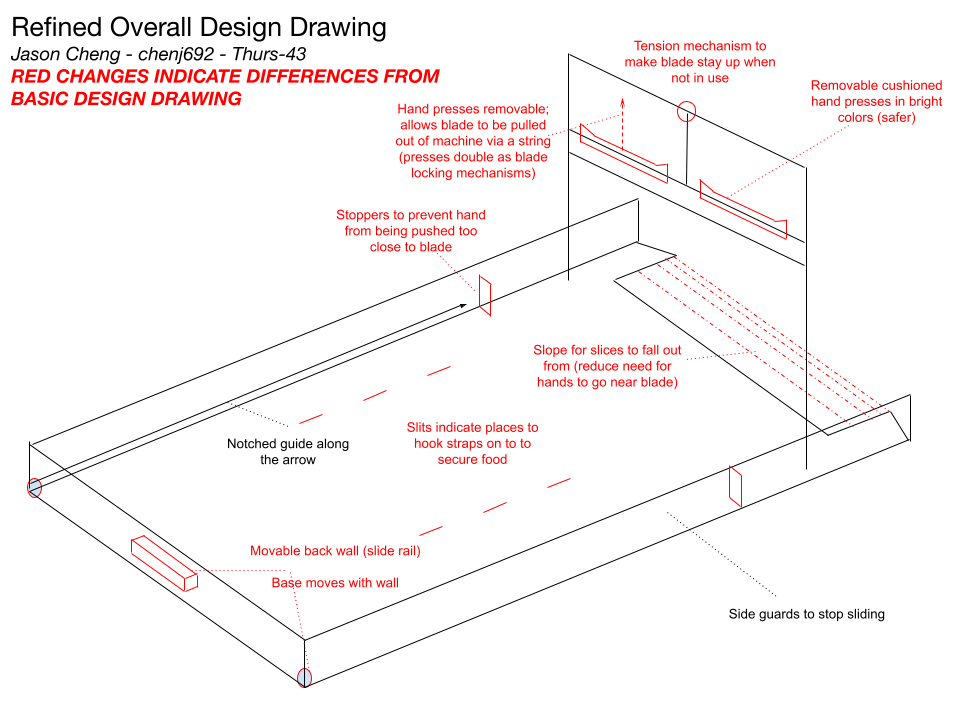
Fig. 2: One of my design drawings.
I helped refined and improve our team's eventual 3D model (Fig. 3), using ideas and parts from my design (Fig. 4). Research and feedback from upper-year students was incorporated into the design, for example:
- A spiked back wall
- A hinge mechanism
- A bracer for both movable side joints
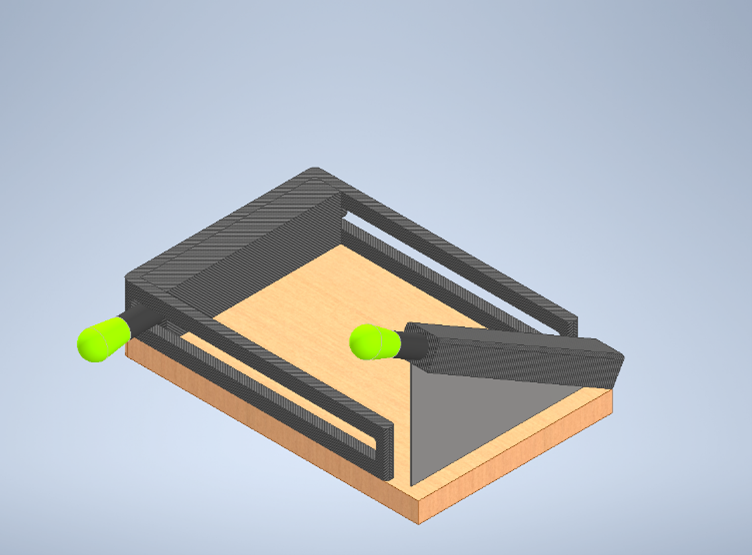
Fig. 3: The Eco-Audit for polypropylene.
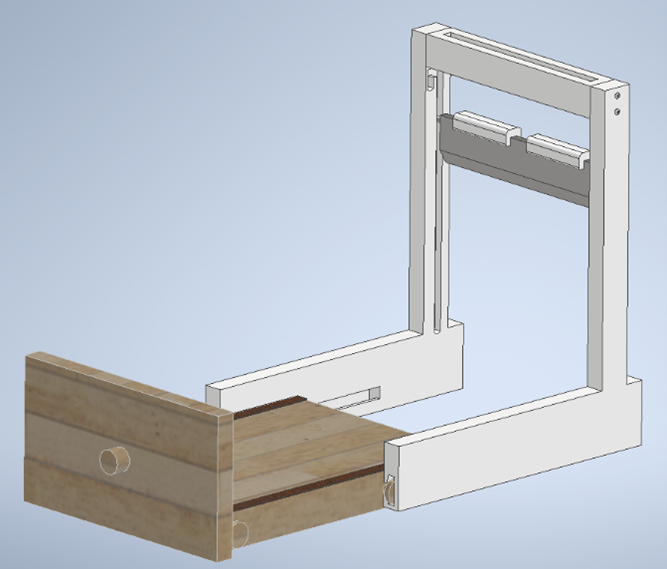
Fig. 4: My life cycle analysis diagram for coir fiber.
The design (Fig. 5) was fabricated using 3D printing and wood cutting. The parts took around 22 hours to print, and I printed around 10 hours of it. We assembled the design using screws, nuts, and washers, using hot glue where needed.
It features numerous safety and usability features, such as:
- Extruded board to catch cut food
- Orange tape so the client can see where to hold
- Ergonormic handholds
- Large cutting area
- Modular design and dissambleable parts
- Helps with cleaning and travel
- Rotatable handholds for comfort
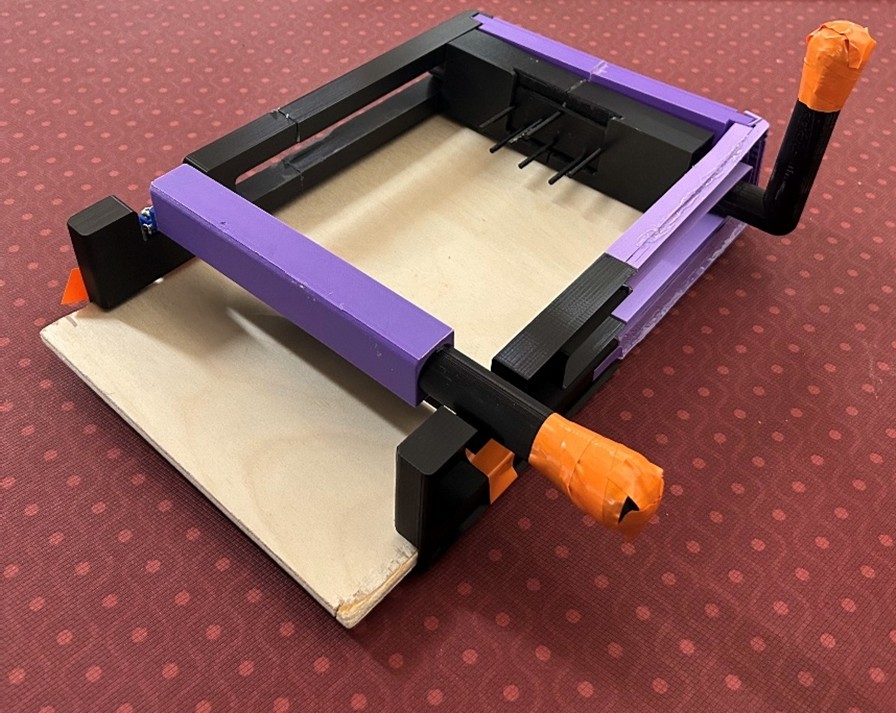
Fig. 5: The final design.
Testing was done to ensure the design held up with the objectives and constraints. A testing plan was created and deployed (Fig. 6) in the days leading to the final presentation.
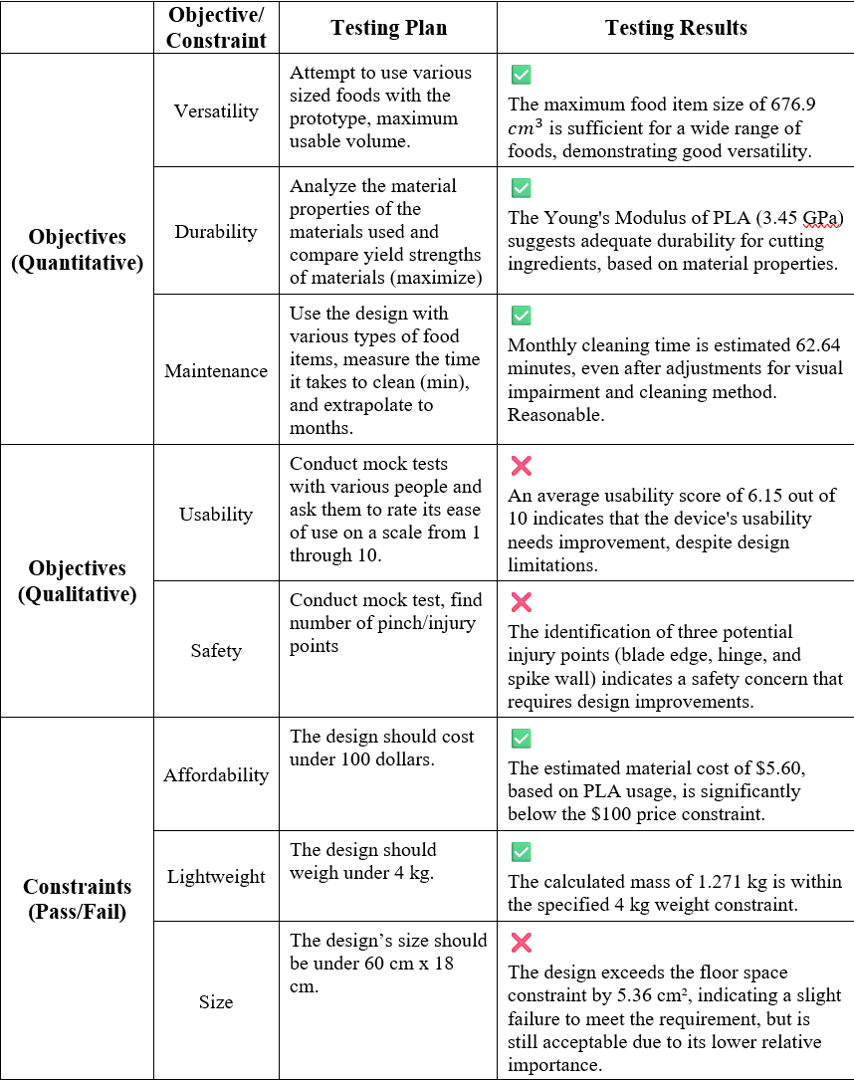
Fig. 6: The testing plan/results for the objectives/constraints.
It passes all but three. Given relative importance of size, it was considered fine, and to improve usability and safety, last-minute changes were made. For example, rubber bumpers on the bottom were deployed to keep the design from moving while in use.
Presentation:I wrote the entire first draft of the twenty-page project report. Afterwards, the team and I went through cleaning up my notes and revising it. A Powerpoint presentation was also written. I created most of the presentation, as well as delegated speaking parts.
■